The Comprehensive Guide to Changing Hub Bearings: A Step-by-Step Approach
Introduction
Hub bearings are essential components in your vehicle's suspension system, responsible for supporting the weight of the vehicle and enabling smooth rotation of the wheels. Over time, hub bearings can wear out or become damaged, leading to various issues that can affect the safety and performance of your car. This comprehensive guide will provide you with a detailed step-by-step approach to changing hub bearings, ensuring you can restore your vehicle's driving experience.
Understanding Hub Bearings
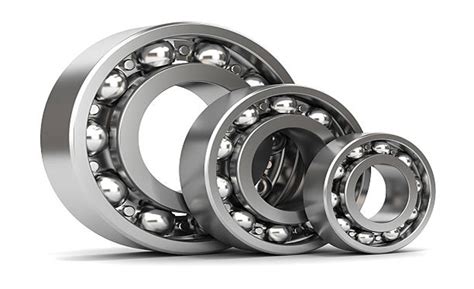
Hub bearings are typically composed of three main components: an inner race, an outer race, and a set of rolling elements.
-
Inner race: Fits onto the wheel hub and rotates with the wheel.
-
Outer race: Attached to the suspension component and provides a fixed support for the inner race.
-
Rolling elements: Ball bearings or tapered roller bearings facilitate smooth rotation between the inner and outer races.
Symptoms of Worn Hub Bearings
Various symptoms can indicate that your hub bearings need to be replaced. These include:
-
Humming or grinding noises: When the bearing is worn or damaged, it may produce a humming or grinding sound from the wheel area.
-
Loose or play in the wheel: Worn bearings can cause the wheel to have excessive play when moved back and forth.
-
Vibration: Damaged bearings can create vibrations that can be felt in the steering wheel, seat, or floorboard.
-
Reduced fuel efficiency: Misaligned or damaged bearings can increase rolling resistance, leading to decreased fuel efficiency.
-
Premature tire wear: Worn bearings can affect wheel alignment, leading to uneven or premature tire wear.
When to Replace Hub Bearings
Replacing hub bearings is crucial to maintain the safety and performance of your vehicle. According to the National Highway Traffic Safety Administration (NHTSA), hub bearing failure is a common cause of wheel detachment and vehicle accidents.

一般来说, 前轮轴承的更换周期为6 - 7万公里, 而后轮轴承的更换周期为10 - 12万公里. However, the replacement interval may vary depending on the type of vehicle, driving conditions, and maintenance practices. As a rule of thumb, it is recommended to have your hub bearings inspected regularly as part of your vehicle's maintenance schedule.

Tools and Materials Required
Before starting the hub bearing replacement process, ensure you have the following tools and materials:
- Jack and jack stands
- Lug wrench
- Pry bar or ball joint separator
- Hammer
- New hub bearing
- Grease
- Anti-seize compound
- Torque wrench
- Safety glasses
- Gloves
Step-by-Step Guide to Changing Hub Bearings
1. Safety First
Engage the parking brake and place the vehicle in park. Position the jack and jack stands at the designated lift points for the vehicle. Raise the vehicle until there is approximately 6 inches of clearance between the ground and the tire to be replaced.

2. Remove the Wheel
Use the lug wrench to loosen the lug nuts on the wheel. Do not remove them completely at this stage. Support the wheel with a jack stand for added safety. Lift the wheel off the ground and remove the lug nuts. Pull the wheel straight towards you to detach it from the hub.
3. Disconnect the Brake Caliper
Locate the brake caliper mounting bolts and remove them. Carefully lift the caliper off the rotor and support it with a bungee cord or wire to prevent straining the brake line. Do not let the caliper hang by the brake line.
4. Remove the Rotor
In most cases, the rotor will slide off the hub once the caliper is removed. If it is stuck, use a rubber mallet to gently tap on the rotor's outer edge until it comes loose.
5. Remove the Hub Assembly
While supporting the hub assembly, remove the hub nut using a socket wrench. Separate the hub assembly from the suspension component by using a pry bar or ball joint separator. It may require some force to break the hub assembly free.
6. Press Out the Old Bearing
Once the hub assembly is removed, use a press to push out the old bearing from the hub. Alternatively, you can use a hammer and a punch to carefully drive out the bearing, but this method requires more caution to avoid damaging the hub.
7. Install the New Bearing
Apply a generous amount of grease to the inner surface of the new bearing. Press the new bearing into the hub using a press or carefully hammer it in place. Ensure that the bearing is seated fully and squarely.
8. Reassemble the Hub Assembly
Apply anti-seize compound to the hub nut and thread it onto the spindle. Tighten the hub nut to the specified torque using a torque wrench. Reattach the hub assembly to the suspension component.
9. Reassemble the Brake System
Place the rotor back onto the hub. Position the brake caliper over the rotor and secure it with the mounting bolts. Tighten the bolts to the specified torque.
10. Install the Wheel
Lift the wheel onto the hub and align it with the lug bolts. Hand-tighten the lug nuts onto the bolts. Lower the vehicle until the wheel is on the ground. Use a torque wrench to tighten the lug nuts to the specified torque in a star pattern.
11. Final Inspection
Double-check all components to ensure they are properly tightened and secured. Check the brake pedal for any sponginess or unusual feel. Test drive the vehicle and listen for any unusual noises or vibrations.
Safety Precautions
- Wear safety glasses and gloves throughout the process.
- Ensure the vehicle is securely supported on jack stands before working underneath it.
- Use caution when handling heavy components such as the hub assembly.
- Tighten all bolts and nuts to the specified torque using a torque wrench.
- If you are not comfortable performing this repair yourself, do not hesitate to consult a qualified mechanic.
Troubleshooting Common Issues
-
Bearing noise persists after replacement: Ensure the new bearing is properly seated and the hub assembly is correctly installed. Inspect the suspension components for any damage or wear that may be causing the noise.
-
Wheel wobbles or vibrates after replacement: Check the wheel balance and alignment. Ensure the lug nuts are tightened to the correct torque. Inspect the hub or suspension components for any damage that may cause the instability.
-
ABS light illuminates after replacement: The ABS sensor may have been damaged or disconnected during the replacement process. Check the sensor and wiring for any issues. Reset the ABS system by following the manufacturer's instructions.
Importance of Using Quality Bearings
Using high-quality hub bearings is crucial for ensuring the longevity and performance of your vehicle. Consider the following benefits:
-
Reduced noise and vibration: Quality bearings minimize friction and noise, resulting in a smoother and quieter ride.
-
Improved handling and stability: Properly functioning bearings allow for smooth wheel rotation, enhancing vehicle handling and stability on various road conditions.
-
Extended lifespan: High-quality bearings are designed to withstand wear and tear, extending their lifespan and reducing maintenance costs.
-
Enhanced safety: Reliable bearings play a vital role in your vehicle's safety by preventing wheel detachment and ensuring proper vehicle control.
Interesting Stories and Lessons Learned
1. The Case of the Humming Tire
A woman brought her car to a mechanic complaining about a humming noise coming from one of the tires. The mechanic inspected the tire and found it to be in good condition. He then checked the hub bearing and discovered that it was worn and damaged. Replacing the hub bearing eliminated the humming noise, and the woman drove away happily.
Lesson: A humming noise from a tire can indicate a worn hub bearing. Ignoring this issue can lead to more severe problems and potential safety hazards.
2. The Wobbly Wheel Woe
A man noticed a slight wobble in his car's wheel while driving. He initially dismissed it as a minor issue, but the wobble gradually worsened over time. When he finally took his car to a mechanic, the problem was traced to a loose hub bearing. Tightening the bearing resolved the wobble, and the man was grateful he addressed the issue before it caused further damage.
Lesson: A wobbly wheel can often be a sign of a loose or damaged hub bearing. Ignoring this issue can compromise vehicle stability and safety.
3. The Premature Tire Wear Puzzle
A driver noticed that his tires were wearing unevenly, with the inner edges showing excessive wear. The mechanic diagnosed the issue as a worn hub bearing that was causing misalignment. Replacing the hub bearing and aligning the wheels solved the problem, preventing further premature tire wear.
Lesson: Uneven tire wear can be a symptom of a worn hub bearing. Addressing this issue promptly can extend the lifespan of your tires and improve vehicle handling.
Conclusion
Changing hub bearings is a crucial maintenance procedure for ensuring the safety and performance of your vehicle. By following the step-by-step approach outlined in this guide, you can successfully replace worn hub bearings and restore your vehicle's driving experience. Remember to use high-quality bearings and prioritize safety throughout the process. If you encounter any difficulties or have concerns, do not hesitate to consult a qualified mechanic for assistance.
