The Ultimate Guide to Changing Trailer Wheel Bearings: A Comprehensive Step-by-Step Approach
Replacing trailer wheel bearings is a crucial task that determines the safety and performance of your trailer. Proper maintenance of these critical components ensures smooth operation, minimizes friction, and prevents premature wear. This comprehensive guide will provide you with a detailed step-by-step approach, coupled with essential information and tips, to help you tackle this project with confidence.
Understanding Trailer Wheel Bearings
Wheel bearings are precision components that allow wheels to rotate smoothly with minimal friction. They bear the weight of the trailer and withstand various forces encountered during travel. In trailers, these bearings typically come in the form of tapered roller bearings, which consist of cone-shaped rollers that roll between two conical raceways.
Importance of Replacing Wheel Bearings
Wheel bearings gradually deteriorate over time due to factors such as friction, heat, and contamination. Neglecting their replacement can lead to:

- Increased friction and heat buildup, causing premature bearing failure
- Damage to the spindle and axle
- Unstable wheel rotation, compromising handling and safety
Step-by-Step Guide to Changing Trailer Wheel Bearings
Note: Safety first! Always follow proper safety precautions and refer to the trailer manufacturer's instructions.
Step 1: Gather Necessary Tools and Materials
-
Wheel bearing kit: Includes new bearings, races, seals, and grease
-
Bearing packer: Tool for applying grease evenly to bearings
-
Grease gun: For lubricating bearings and seals
-
Torque wrench: To properly tighten castle nut
-
Hammer: For removing and installing bearings
-
Hub puller: For detaching hub from spindle
-
Cold chisel: For separating bearing races
-
Safety glasses and gloves: For protection
Step 2: Elevate and Secure the Trailer
- Park the trailer on a level surface and engage the parking brake.
- Raise the affected side of the trailer using a jack or jack stands.
- Secure the trailer with wheel chocks to prevent movement.
Step 3: Remove the Wheel
- Loosen the wheel lug nuts but do not remove them completely.
- Lift the wheel and slide it off the spindle.
Step 4: Detach the Hub
-
Front hub: Locate and remove the cotter pin or lockwasher that secures the castle nut. Use a torque wrench to loosen the castle nut. Use a hub puller to separate the hub from the spindle.
-
Rear hub: Remove the nut securing the hub to the spindle. Use a hub puller to detach the hub.
Step 5: Remove the Old Bearings and Seals
- Use a cold chisel and hammer to carefully pry out the old outer bearing from the hub.
- Remove the outer race from the hub using the chisel and hammer.
- Slide off the inner bearing from the spindle.
- Remove the inner race from the spindle.
- Use a small tool to carefully remove the old seals.
Step 6: Inspect the Spindle and Hub
- Inspect the spindle and hub for any damage, wear, or corrosion.
- Clean the spindle and hub thoroughly with brake cleaner or solvent.
- If any significant damage is found, the spindle or hub may need to be replaced.
Step 7: Install New Bearings and Seals
-
Outer bearing: Apply a liberal amount of grease to the new outer bearing using a bearing packer.
- Place the outer bearing onto the spindle.
- Use a hammer to carefully tap the bearing into place until it is fully seated.
-
Inner bearing: Pack the inner bearing with grease and slide it onto the spindle.
- Use a hammer to gently tap the bearing into place until it is fully seated.
Step 8: Install New Races
- Apply a thin coat of grease to the inner race and place it over the inner bearing on the spindle.
- Apply a thin coat of grease to the outer race and place it into the hub.
Step 9: Reassemble the Hub
- Place the hub back onto the spindle.
-
Front hub: Tighten the castle nut to the specified torque and install a new cotter pin or lockwasher.
-
Rear hub: Tighten the nut to the specified torque.
Step 10: Install the Wheel and Tighten Lug Nuts
- Slide the wheel back onto the spindle.
- Tighten the wheel lug nuts using a torque wrench to the specified torque.
Step 11: Grease and Inspect the Bearings
- Use a grease gun to inject grease into the zerk fitting on the hub.
- Rotate the wheel manually to distribute the grease evenly.
- Re-check the torque of the wheel lug nuts after driving a short distance.
Common Mistakes to Avoid
- Using incorrect bearings or seals
- Insufficiently greasing bearings
- Overtightening castle nut
- Neglecting to inspect the spindle and hub for damage
- Reusing old bearings or seals
Benefits of Regular Wheel Bearing Maintenance
Regularly changing trailer wheel bearings offers numerous benefits:

-
Improved safety: Reduced risk of bearing failure and related accidents
-
Enhanced trailer performance: Smoother wheel rotation and reduced rolling resistance
-
Extended trailer lifespan: Prevention of premature damage to spindles, axles, and other components
-
Reduced maintenance costs: Early detection and replacement of bearings saves money in the long run
-
Increased peace of mind: Knowing that your trailer is in optimal condition
Conclusion
Changing trailer wheel bearings is a crucial task that can be accomplished with the right tools, materials, and a systematic approach. By following the step-by-step guide outlined in this article, you can ensure the safety and longevity of your trailer. Remember to address any issues promptly and follow a regular maintenance schedule to prevent costly repairs and unnecessary downtime. If you encounter any difficulties or have any specific questions, do not hesitate to consult a qualified mechanic for assistance. Safe travels!
Tables
Table 1: Trailer Wheel Bearing Inspection Schedule
| Component | Inspection Interval |
|---|---|---|
| Bearings | Every 12-18 months or 10,000-15,000 miles |
| Seals | Every 24-36 months or 20,000-30,000 miles |
| Spindle and Hub | Every 12 months or 10,000 miles |

Table 2: Recommended Torque Specifications for Wheel Lug Nuts
| Trailer Weight (lbs) | Torque (ft-lbs) |
|---|---|---|
| Up to 3,000 | 90-110 |
| 3,000-5,000 | 110-130 |
| 5,000-7,000 | 130-150 |
| 7,000-9,000 | 150-170 |
| 9,000+ | 170-190 |
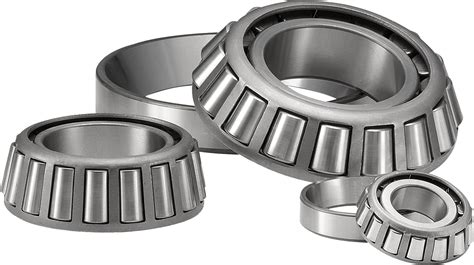
Table 3: Average Replacement Costs for Trailer Wheel Bearings
| Component | Cost |
|---|---|---|
| Wheel bearing kit | $50-$100 |
| Labor (if needed) | $100-$200 |
| Total | $150-$300 |
