The Ultimate Guide to Replacing a Wheel Bearing: A Step-by-Step Walkthrough for Beginners
Introduction
Your vehicle's wheel bearings play a crucial role in ensuring smooth and safe driving. However, like all mechanical components, they can deteriorate over time, leading to a range of issues that can compromise your safety on the road. Replacing a wheel bearing may seem like a daunting task, but with the right guidance, it can be accomplished with relative ease. This comprehensive guide will provide you with a step-by-step walkthrough of the process, ensuring you can restore your vehicle's performance and maintain your peace of mind behind the wheel.
Understanding Wheel Bearings
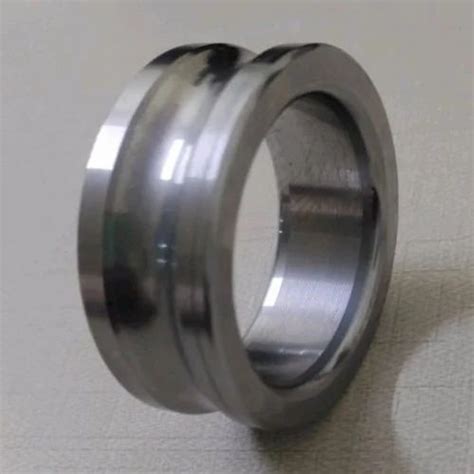
Before delving into the replacement process, it's essential to understand the importance and construction of wheel bearings. These small but vital components are located inside the wheel hub and facilitate the smooth rotation of the wheels. They consist of two main elements:
-
Inner Race: This part attaches to the wheel hub and rotates with it.
-
Outer Race: The outer race fits within the wheel bearing assembly and remains stationary.
When these surfaces grind against each other, friction is generated, which can damage the bearing over time and compromise performance.
Common Symptoms of a Bad Wheel Bearing
Ignoring a worn-out wheel bearing can exacerbate the problem and lead to more severe and costly repairs. Here are some common symptoms to watch out for:

-
Grinding Noise: A persistent grinding sound, especially when turning or accelerating, can indicate a failing wheel bearing.
-
Wobbling or Vibration: Loose or damaged wheel bearings can cause the wheel to wobble or vibrate, making driving uncomfortable and potentially hazardous.
-
Increased Tire Wear: Reduced bearing lubrication leads to increased tire wear, as the tire rotates unevenly.
-
Premature Brake Pad Wear: Failed wheel bearings can cause the wheel to not rotate smoothly, which can accelerate brake pad wear.
Importance of Replacing Wheel Bearings
Timely replacement of faulty wheel bearings is crucial for maintaining optimal vehicle performance and safety. Here are a few reasons why it matters:
-
Ensuring Safe Driving: Worn-out wheel bearings can compromise handling and increase the risk of accidents.
-
Protecting Other Components: Failing wheel bearings can damage other suspension components, such as ball joints and CV axles.
-
Preventing Expensive Repairs: Neglecting a wheel bearing issue can lead to more costly damages in the long run.
-
Improving Fuel Efficiency: Properly functioning wheel bearings reduce rolling resistance, contributing to better fuel economy.
Benefits of Replacing Wheel Bearings
Investing in wheel bearing replacement offers several tangible benefits:
-
Smoother Driving Experience: New wheel bearings eliminate grinding noises and vibrations, providing a more comfortable and pleasant driving experience.
-
Enhanced Safety: Optimal wheel bearing performance contributes to better handling and stability, making driving safer.
-
Reduced Repair Costs: Replacing a wheel bearing promptly prevents further damage to other suspension components, saving you money on repairs.
-
Increased Vehicle Value: Maintained wheel bearings enhance the overall value of your vehicle.
Pros and Cons of DIY Wheel Bearing Replacement
Whether to tackle a wheel bearing replacement yourself or seek professional assistance is a decision that depends on your skills and resources. Here are the pros and cons of both options:

DIY Replacement:
Pros:
-
Cost Savings: Replacing a wheel bearing yourself can significantly reduce expenses compared to professional fees.
-
Convenience: You can complete the task at your own pace and convenience, without the pressure of a mechanic's schedule.
-
Skill Enhancement: Undertaking a wheel bearing replacement can expand your DIY repair knowledge.
Cons:
-
Time Commitment: A wheel bearing replacement can be a time-consuming process, especially for beginners.
-
Special Tools Required: You will need specialized tools, such as a press and impact wrench, which may not be readily available at home.
-
Risk of Mistakes: Inexperience can increase the risk of making mistakes during the process.
Professional Replacement:
Pros:
-
Expert Diagnosis and Repair: A qualified mechanic will accurately diagnose the issue and ensure proper wheel bearing replacement.
-
Warranty: Most mechanics offer a warranty on their work, providing peace of mind in the event of any subsequent problems.
-
Time Efficiency: Professionals have the necessary tools and experience to complete the replacement efficiently.
Cons:
-
Higher Cost: Professional wheel bearing replacement can be more expensive than DIY repair.
-
Scheduling Inconvenience: You may need to schedule an appointment and wait for the work to be completed.
-
Limited Availability: Mechanics can be busy, especially during peak season, which may delay your repair.
Step-by-Step Wheel Bearing Replacement Guide
Materials:
- New wheel bearing and hub assembly
- Socket wrench set
- Torque wrench
- Press or hammer
- Grease
- Safety glasses
- Gloves
Safety Precautions:
- Park the vehicle on a stable and level surface.
- Engage the parking brake to prevent movement.
- Place wheel chocks behind the wheels opposite the one being worked on.
- Wear safety glasses and gloves throughout the process.
Steps:
1. Remove the Wheel
- Use a lug wrench to loosen the lug nuts on the wheel, but do not remove them completely.
- Engage the jack to lift the vehicle and place a jack stand under the designated jack point.
- Remove the lug nuts by hand and pull the wheel straight towards you to detach it from the hub.
2. Disassemble the Hub
- Remove the brake caliper bolts and carefully lift the caliper away from the rotor, suspending it with wire or bungee cord to prevent damage to the brake line.
- Remove the rotor by gently tapping it with a hammer and mallet.
- Using a deep socket wrench, unscrew the hub nut completely.
3. Remove the Old Wheel Bearing
- Drive out the hub assembly from the knuckle using a press or hammer.
- Remove the old wheel bearing from the hub assembly.
4. Install the New Wheel Bearing
- Apply a thin layer of grease to the mating surfaces of the new wheel bearing and the hub assembly.
- Press the new wheel bearing into the hub assembly using a press or hammer. Ensure it is fully seated.
5. Assemble the Hub
- Install the hub assembly into the knuckle and tighten the hub nut to the specified torque value using a torque wrench.
- Reinstall the brake rotor.
6. Reattach the Brake Caliper
- Slide the brake caliper over the rotor and secure it with bolts.
- Apply brake grease to the caliper bolts before installation.
7. Reinstall the Wheel
- Lift the wheel onto the hub and align the lug holes.
- Thread the lug nuts onto the bolts and tighten them using the lug wrench.
8. Lower the Vehicle
- Remove the jack stand and slowly lower the vehicle.
- Fully tighten the lug nuts using the torque wrench.
9. Test Drive
- Take your vehicle for a test drive to ensure there are no unusual noises or vibrations.
Tips and Tricks
- Use a torque wrench to ensure all bolts are tightened to the specified values.
- Apply anti-seize compound to the lug nuts to prevent corrosion.
- If you do not have access to a press, you can use a hammer to install and remove the wheel bearing, but proceed with caution.
- If the wheel bearing is stuck, you may need to use a penetrating oil to loosen it.
- Avoid spinning the wheel bearing while it is not fully installed, as this can damage it.
Humorous Stories of Wheel Bearing Woes
-
The Case of the Singing Wheel: One driver noticed a peculiar singing sound coming from their car. After inspecting the vehicle, they discovered that a worn-out wheel bearing was emitting a melodic tune as it rotated.
-
The Unbalanced Wheel: Another driver experienced severe vibrations while driving. They brought their car to a mechanic, who found that one of the wheel bearings had failed, causing the wheel to become unbalanced and shake violently.
-
The Costly Lesson: A frugal driver attempted to replace a wheel bearing themselves. However, they made a crucial mistake and installed the bearing upside down, which resulted in a premature failure and a costly repair bill.
Lessons Learned from These Humorous Incidents
These humorous stories highlight the importance of:
-
Seeking Professional Help: Attempting complex repairs without the necessary skills and knowledge can lead to costly mistakes.
-
Proper Installation: Following manufacturer specifications and guidelines is crucial to ensure proper component functioning.
-
Regular Maintenance: Regularly inspecting and servicing your vehicle can help identify potential issues early on, preventing major failures.
Conclusion
Replacing a wheel bearing can be a daunting task, but with proper planning, preparation, and a step-by-step approach, it is achievable even for beginners. By addressing wheel bearing issues promptly, you can ensure a smoother, safer, and more enjoyable driving experience while protecting your vehicle's overall performance and value. Whether you choose to tackle this repair yourself or seek professional assistance, remember that proper execution and attention to detail are key to a successful outcome.
