The Art of Installing a Bearing Buddy: A Comprehensive Guide
Introduction
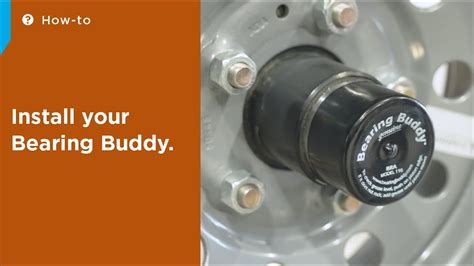
The humble bearing buddy plays a vital role in the longevity and maintenance of wheel bearings in trailers, RVs, and other heavy-duty applications. Installing one correctly is crucial to prevent bearing failure, reduce downtime, and ensure safe operation. This comprehensive guide will delve into the intricacies of installing a bearing buddy, empowering you with the knowledge and skills to tackle this task with confidence.
Materials You'll Need:
- Bearing buddy
- Grease gun
- Bearing grease
- Rags
- Jack or wheel chocks
- Safety glasses
- Gloves
Step-by-Step Installation:
-
Safety First: Always engage the parking brake, place the vehicle in gear, and use jack stands or chocks to prevent movement. Wear safety glasses and gloves for protection.
-
Remove the Old Buddy (If Existing): Locate the existing bearing buddy on the trailer axle. Using a wrench, carefully loosen and remove the grease cap. Next, unbolt the buddy from the spindle using the appropriate socket or wrench.
-
Prepare the Bearing Buddy: Clean the spindle and bearing area with a rag. Apply a thin layer of bearing grease to the spindle. Slide the bearing buddy onto the spindle and align it properly.
-
Secure the Buddy: Tighten the mounting bolts to the specified torque using a torque wrench. Overtightening can damage the buddy or spindle.

-
Pack the Buddy with Grease: Fill the bearing buddy with bearing grease using a grease gun. Continue pumping until fresh grease emerges from the weep hole.

-
Install the Grease Cap: Place the grease cap on the buddy and tighten it securely. This cap prevents contaminants and moisture from entering the bearing buddy.
Tips and Tricks:
-
Use the Right Grease: Select a bearing grease specifically designed for trailer bearings. Avoid using general-purpose greases, as they may not provide optimal lubrication.
-
Don't Overfill: Overfilling the bearing buddy can lead to pressure buildup, which can damage the seal and bearings.
-
Protect the Buddy: Shield the bearing buddy from road debris and other hazards by installing a protective cap or sleeve.
-
Inspect Regularly: Periodically check the bearing buddy for leaks, damage, or loose bolts. Replace as necessary.
Why It Matters: Benefits of Installing a Bearing Buddy
Installing a bearing buddy offers several critical benefits:
-
Extended Bearing Life: A properly installed bearing buddy keeps bearings well-lubricated, reducing friction and wear, thereby extending their lifespan.
-
Reduced Downtime: By preventing bearing failure, a bearing buddy minimizes downtime and keeps your trailer or RV on the road.
-
Increased Safety: Failed bearings can lead to dangerous situations. A bearing buddy reduces the risk of accidents and ensures safe operation.
Frequently Asked Questions (FAQs)
1. How often should I repack a bearing buddy?
Every 5,000-7,000 miles or annually, whichever comes first.
2. Can I use any type of bearing grease?
No, use grease specifically formulated for trailer bearings.
3. What happens if I overfill the bearing buddy?
Overfilling can cause pressure buildup, damaging the seal and bearings.
4. Is it okay to drive with a leaking bearing buddy?
No, a leaking bearing buddy indicates a compromised seal. Fix or replace it immediately.
5. Can I install a bearing buddy myself?
Yes, with the right tools and this guide, you can install a bearing buddy on your own.
6. What are the signs of a failed bearing?
Grinding noises, excessive heat, play in the wheel, and vibration.
Humorous Stories: Lessons Learned
-
The Overzealous DIYer: Once upon a time, a self-proclaimed handyman attempted to install a bearing buddy on his RV. He overtightened the bolts, damaging the spindle. The result? A costly repair and a valuable lesson on the dangers of excessive force.
-
The Absent-Minded Mechanic: A mechanic forgot to install the grease cap after repacking a bearing buddy. As the trailer traveled, debris entered the buddy, contaminating the grease and leading to premature bearing failure.
-
The Ignorant Driver: A camper van owner ignored the signs of a leaking bearing buddy. Result? A ruined bearing and a broken axle, stranding the driver in the middle of nowhere.
Useful Tables:
| Table 1: Grease Consumption by Bearing Buddy Size |
|---|---|
| Buddy Size | Grease Capacity (oz) |
| 2400 | 4 |
| 2500 | 6 |
| 2700 | 8 |
| 2800 | 10 |
| Table 2: Torque Specifications for Mounting Bolts |
|---|---|
| Buddy Size | Mounting Bolt Torque (ft-lbs) |
| 2400 | 10-15 |
| 2500 | 15-20 |
| 2700 | 20-25 |
| 2800 | 25-30 |
| Table 3: Estimated Installation Time |
|---|---|
| Buddy Size | Installation Time |
| 2400 | 30-45 minutes |
| 2500 | 45-60 minutes |
| 2700 | 60-75 minutes |
| 2800 | 75-90 minutes |
Call to Action
Regularly installing a bearing buddy is a testament to your commitment to maintaining your trailer or RV. By following the steps outlined in this guide, you can confidently embark on this essential task. Remember, the benefits of a well-installed bearing buddy are immeasurable in terms of extended bearing life, reduced downtime, and increased safety.
So, grab your tools, gather your materials, and give your trailer or RV the gift of proper bearing maintenance. Protect your investment, ensure a smooth ride, and enjoy the peace of mind that comes with knowing your bearings are well taken care of.
