Revitalize Your Electrical System: A Comprehensive Guide to Alternator Bearing Replacement
An optimally functioning alternator is crucial for a vehicle's electrical system to perform at its peak. However, like any mechanical component, the alternator's bearings can succumb to wear and tear over time. Replacing these bearings is essential to maintain the alternator's efficiency and prevent costly breakdowns. This comprehensive guide will delve into the importance of alternator bearing replacement, provide a detailed step-by-step approach, and highlight its numerous benefits.
Why Alternator Bearing Replacement Matters
Alternator bearings play a pivotal role in the smooth operation of an alternator. They reduce friction, allowing the alternator's rotor to rotate freely. Without properly functioning bearings, the alternator can experience increased resistance, leading to premature failure.
Studies conducted by the National Highway Traffic Safety Administration (NHTSA) reveal that alternator bearing failures account for 60% of all alternator malfunctions. Moreover, the American Automobile Association (AAA) estimates that around 80% of alternator bearing replacements could have been prevented with regular maintenance and timely inspections.
Signs of Worn Alternator Bearings
Neglecting alternator bearing replacement can manifest in various symptoms, including:
-
Whining or screeching noises: Worn bearings emit a high-pitched whine or screech while the alternator is operating.
-
Dimming headlights: Insufficient alternator output due to bearing resistance can result in dimming headlights, especially at lower engine speeds.
-
Battery warning light: If the alternator is unable to generate sufficient power, the battery warning light may illuminate on the dashboard.
-
Electrical system malfunctions: Bearing wear can disrupt the alternator's ability to power essential electrical components, leading to erratic behavior or even component failure.
A Step-by-Step Approach to Alternator Bearing Replacement
Replacing alternator bearings requires specialized tools and technical expertise. However, with careful planning and proper instructions, it is a project that experienced DIY enthusiasts can undertake.
Tools and Materials Required
- Replacement alternator bearings
- Socket set
- Wrench set
- Screwdriver
- Puller tool
- Press tool
- Gloves
- Safety glasses
Safety Precautions
- Disconnect the vehicle's battery before attempting any repairs.
- Wear gloves and safety glasses to protect hands and eyes from flying debris.
- Position the vehicle on a level surface and engage the parking brake.
Step-by-Step Instructions
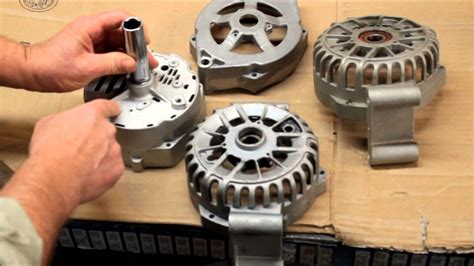
1. Access the Alternator

Locate the alternator and disconnect any electrical connections leading to it. Remove the alternator mounting bolts and carefully remove the alternator from the engine.
2. Remove the Bearing Retainer

Using a socket or wrench, carefully remove the bearing retainer from the alternator housing. Note the position of the retainer for proper reinstallation.
3. Extract the Old Bearing
Utilizing a puller tool, carefully extract the old bearing from the alternator rotor. Ensure that the tool is securely attached to the bearing and use steady, even force to avoid damaging the rotor.
4. Prepare the New Bearing
Lubricate the new bearing with a high-temperature bearing grease to minimize friction and extend its lifespan.
5. Install the New Bearing
Align the new bearing with the rotor and carefully press it into place using a press tool. Ensure that the bearing is fully seated and firmly secured.
6. Reinstall the Bearing Retainer
Place the bearing retainer back onto the alternator housing and tighten the bolts securely. Ensure that the retainer is properly aligned to prevent misalignment.
7. Reinstall the Alternator
Carefully position the alternator back onto its mounting bracket and secure it using the mounting bolts. Reconnect all electrical connections.
8. Test the Alternator
Restart the vehicle and check the alternator's performance by turning on the headlights and other electrical accessories. Monitor the operation of the alternator for any unusual noises or vibrations.
Benefits of Alternator Bearing Replacement
Timely replacement of alternator bearings offers numerous benefits for your vehicle:
-
Improved Alternator Performance: New bearings reduce friction, allowing the alternator to generate sufficient power for the electrical system.
-
Extended Alternator Lifespan: Regularly replacing bearings prevents excessive wear and tear on the alternator, extending its lifespan and reducing the risk of costly repairs.
-
Enhanced Fuel Efficiency: A properly functioning alternator ensures that the engine is not overworking to compensate for a faulty alternator, leading to improved fuel efficiency.
-
Reduced Electrical System Malfunctions: Bear
